
If there were no joints created, installing drywall would be the easiest job on the planet. However, no matter how big your drywall sheets are, you must deal with joints or seams.
The ideal drywall joint is one where two tapered edges are connected. This makes it easier for you to fill and smoothen the seams with drywall compound.
But what if you have a drywall tapered edge and a non-tapered edge? How would you go about joining these two and achieving a flawless finish?
The article below is dedicated to guiding you on how you can join a drywall tapered edge to a non-tapered edge and create a smooth finish.
What is the Difference Between a Drywall Tapered Edge and a Non-Tapered Edge?
Before we get to the guide, we need to differentiate these two types of drywall edges.
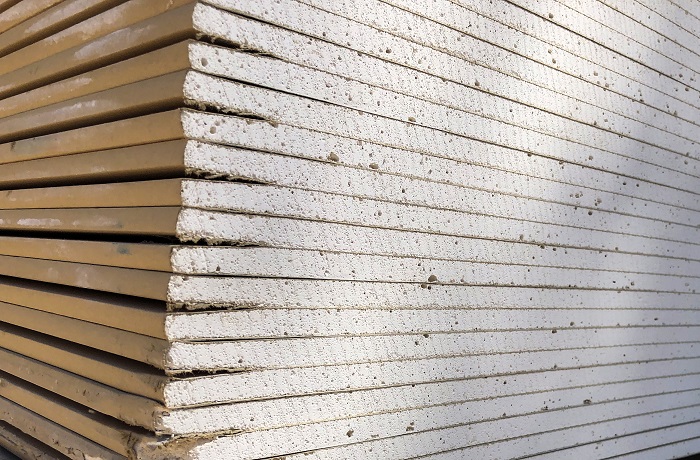
A drywall tapered edge is usually a bit thinner than other parts of the drywall and is located on the long ends of the sheet. The best way to join drywall sheets is by fitting two tapered edges together.
Because these edges are thinner, they create a V gap that can accommodate the drywall compound when joined together. The tapered edge is about an eighth inch thinner than the rest of the drywall.
A non-tapered edge is the end of a drywall sheet that has been cut into one or two pieces. Non-tapered edges are usually the same thickness as other parts of the drywall. For instance, if drywall is half inches thick, the non-tapered edge will be half inches thick.
Connecting non-tapered edges usually requires a lot of work because no V-gap in the joints can accommodate the drywall compound.
It’s normal for you to find yourself joining a drywall tapered edge to a non-tapered edge. Sometimes, when installing drywall, you may have to cut some boards to fit certain areas.
After cutting some of these boards, you will most likely end up with a seam with both a tapered edge and a non-tapered edge.
How to Join a Drywall Tapered Edge to a Non-Tapered Edge?
Step 1: Gather Essential Materials
There are a couple of tools you’re going to need. Examples include drywall compound, drywall tape, and a sanding screen.
Tools such as a utility knife, a drywall knife, and a sander will also come in handy. I highly recommend you get breathing protection. Sanding drywall can be quite dusty.
Step 2: Make a 45 Degree Cut on the Non-Tapered Edge
The reason behind making this cut isn’t to create a V-gap similar to the tapered edge. But this cut removes the stray paper on the non-tapered edge.
If you don’t remove the paper on this edge, it often buckles and develops into a ridge that can make the surface look ugly. Before you proceed to the other steps, cut the non-tapered edge at a 45-degree angle.
It can be tempting to create a tapered edge, but this is usually a little bit difficult to do by hand, especially with a utility knife.
Step 3: Apply Some Drywall Compound and Tape the Seam
Using a drywall knife, apply some compound onto the joints of your tapered and non-tapered edges. Don’t be too generous with the compound because that would create a huge bump.
Immediately cut and tape the seam. Ensure that it adheres firmly and that there are no folds or bubbles. A drywall knife can help you eliminate any bubbles forming beneath the tape. If you had used excess compound, the drywall knife should push it out of the tape.
It’s always a good idea to give drywall tape time to dry before you can work over it. The tape can move around easily when it’s still wet. Twenty-four hours should be enough time.
Step 4: Bring in Some More Drywall Compound
For aesthetic reasons, the tape should never be left exposed. This is why you should apply some more drywall compound over the tape. Don’t spread the compound too far away from the tape.
Ensure it’s at least an inch or two away from the seam. As you apply the drywall compound, make sure that you smoothen it out using a utility knife.
Step 5: Sand to Remove Bumps on the Seam
If you are new to drywall installation, it’s normal for your joints to have bumps. The good news is that you can easily eliminate them through sanding.
Examine the seam and look for any bumps that seem to be protruding. Sand them down lightly. It’s advisable not to sand all over the seam because you may interfere with the tape.
During this step, it’s advisable to wear a mask because sanding drywall can be very dusty.
Step 6: Apply the Last Coat of Drywall Compound and Lightly Sand It
To wrap up your project, apply the final coat of drywall compound. Use a bigger drywall knife this time and spread it further away from the seam.
This creates a uniform finish with the rest of the drywall. You can also sand it down if you spot any peaks or bumps.

How Much Drywall Compound Do You Need to Join a Tapered Edge to a Non-Tapered Edge?
For such a joint, you need to use as little drywall compound as possible. When joining a tapered edge to a non-tapered one, there isn’t enough room in the seam for a lot of drywall compound.
Therefore, if you use a lot, you may end up with a huge bump that will need a lot of sanding to sit flush with the rest of the drywall. You shouldn’t be too generous with the drywall compound.
Can I Pull Off Such a Project by Myself, or Do I Need Professional Help?
Joining two drywall sheets is a skill that takes time to master. Even if you are joining two tapered edges, without experience, such a project can be challenging.
The good news is that if you follow the above tips, you can create a smooth joint between a tapered and non-tapered edge. If you have been installing drywall for some time, you don’t need professional help.
But if you are entirely new to drywall installation, I would advise you to hire an expert for such a project.
Will a Non-Tapered Drywall Edge Lower the Strength of the Joint?
The paper on the edge of the drywall is indeed responsible for its structural strength. However, as long as you cover the joint with drywall tape and compound, you don’t have to worry about the non-tapered edge.
Can’t You Replace the Non-Tapered Edges with New Drywall Sheets?
If you find yourself with a joint that has a tapered and non-tapered edge, you can always replace the latter with new drywall sheets that have tapered edges. And you will have the perfect seam.
However, when you do that, you will waste a lot of drywall sheets. And if you are working on a budget, such an approach can waste a lot of your money. The most economical method is to create a joint following the instructions in the guide above.
Can You Find Drywall with Non-Tapered Edges?
All drywall comes with tapered edges. The only source of non-tapered drywall edges is if you cut one down. But it is rare to come across a drywall sheet manufactured with non-tapered edges.
This even begs the question of why anyone would be interested in drywall with non-tapered edges considering how challenging it is to join such pieces to tapered edges.