
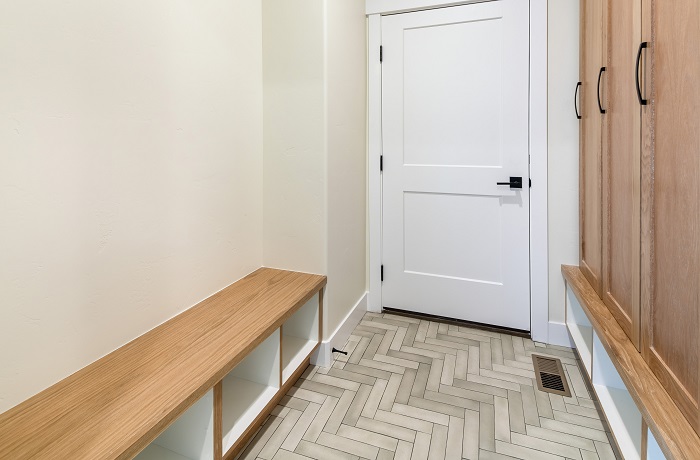
Named after the pattern of a herring fish’s skeleton, the herringbone tile is a classic and unique design. This tile pattern has withstood the test of time. It’s still as popular as it was back in the 17th century.
This design entails the installation of rectangular pieces of tile in a zig-zag pattern. From a distance, herringbone tiles resemble an arrow because of the 45-degree angle that is created from two adjacent rectangular tiles.
Many property owners love herringbone tiles. However, because of their complex design, these tiles aren’t the easiest to install.
There are a couple of problems that are associated with herringbone tiles and that’s what we will be discussing in this article. Understanding these key issues will help you create a flawless herringbone tiling pattern.

1. Crooked Lines
This is by far the biggest challenge people face when dealing with herringbone tiles. Unless you are an exceptionally gifted tiler, getting a precise alignment with this tile pattern isn’t going to be a walk in the park.
The best remedy for crooked lines in herringbone tiles is to use a laser level or a chalk line. These two tools come in handy during the preparation stage as they help you create a reference line to follow when laying the herringbone tiles.
The other way of dealing with crooked lines is by dry-fitting the tiles before the actual installation. This will give you a sneak peek of how precise the tile alignment looks. With proper planning and preparation, this is a herringbone tile problem that can easily be avoided.
2. Tile Wastage
For you to create the herringbone pattern, a lot of tile cutting is involved. If you are not keen, you may end up wasting a lot of tiles which will make the project more expensive.
Even though you may forego the need for a tile cutter in other basic jobs, when it comes to herringbone tiles, this tool is a must-have.
A tile cutter will ensure your herringbone tiles are cut precisely according to the measurements estimated. Therefore, you will minimize tile wastage and lower the costs of your project.
3. Unevenness Amongst Adjacent Tiles
As you fit the tiles at a 45-degree angle, you may notice that adjacent tiles are not even. This is a problem that will occur when you don’t use a laser leveler. Herringbone tiles need to be leveled.
That’s the only way you can beat unevenness. Before installing these tiles, grab a leveler and make markings on the wall on where you should lay the tiles and how the adjacent ones will be fitted at your preferred angle.
4. Accumulation of Dirt on the Grout Lines
This is a general problem that affects all tiles, including the herringbone pattern. With time, dirt and stains will find their way to your grout lines. In case that happens, a soft brush and a grout cleaner should come in handy in getting rid of dirt. Also, if you can occasionally apply a grout sealer to your herringbone tiles, that would ensure they always look flawless.
Is It Difficult to Install Herringbone Tiles?
I wouldn’t say that it’s difficult. Challenging is the right word to use when referring to the installation of herringbone tiles. The pattern of this tile design is what makes installing herringbone tiles challenging.
However, if you perform thorough planning which includes using a laser leveler to mark where to lay the tiles and a tile cutter to minimize wastage, you should be able to create a flawless pattern.
If you have done a couple of tiling jobs in the past, once you get the hang of laying herringbone tiles, it should be easier for you. However, if you are a total newbie, it may take several attempts to get it right.
The good news is that there are many expert tile contractors out there that can do this job for you. If you doubt your skills and ability to create a herringbone tile pattern, don’t hesitate to get in touch with a contractor who is familiar with this design.
What are the Advantages of Herringbone Tiles?
Because I have highlighted the main problems with herringbone tiles, it’s only fair that I also list some of the benefits of this tile pattern.
After all, if herringbone tiles were entirely problematic, they wouldn’t still be popular today. Here are some of the perks of installing herringbone tiles;
• They have a unique aesthetic appeal – Most people are used to regular tiles. However, if you use the herringbone pattern, it can significantly enhance the aesthetics of your room. Due to the zig-zag design, herringbone tiles look amazing.
• Herringbone tiles open up your spaces – One of the reasons you will find this design in bathrooms and small kitchens is because it creates an illusion of more space.
• This design also directs the attention of people to a focal point – Earlier, I mentioned that herringbone tiles resemble an arrow. If laid strategically they can channel the design of a room to a particular focal point.
• It’s a timeless pattern – Did you know that herringbone tiles date back to the 17th century? This pattern was used by the Romans to build roads. Four centuries later, it’s still popular. This is enough proof that herringbone tiles are timeless.
• You can use this pattern anywhere – Herringbone tiles aren’t only ideal for bathroom walls. You can use this design as your backsplash or around the fireplace. The versatility of herringbone tiles extends to all types of tiles.
Herringbone Tile Alternatives
Due to the above problems associated with herringbone tiles, you may want to explore other tile patterns and layouts. Fortunately, many herringbone tile alternatives look equally as good.
And some of these patterns are very easy to install and don’t have as many problems as the herringbone design. Check out some of these top herringbone tile alternatives.
1. Grid
This is the most common tile design you will come across. It entails tiles that are stacked in a straight line. It’s a pretty simple design and there are no angles or off-setting needed. Grid patterns were commonly used in traditional homes.
2. Off-set Brick
In this design, the tiles are stacked to resemble a brick wall. The tiles in offset brick are designed to start in the middle of the one above it. I prefer the brick design compared to the grid pattern because it’s more classic with a touch of sophistication.
3. A Third Offset
This is just like the brick pattern but there is a third offset between the tile laid on top and the one below it. A third offset tile pattern usually creates a unique staggered design. It’s much easier to install than the herringbone tile.
4. Random
This is a pattern that’s becoming very common in modern homes. It entails playing around with two or more tile colors.
Random tile patterns come off as pretty bold and distinct. Unlike the herringbone pattern, random tiles are a bit chaotic. You should keep in this mind before making a decision.
5. Diamond
In this design, tiles are laid in a tilted 45-degree angle. They, therefore, resemble a diamond shape.
What I love most about diamond tiles is that you can integrate them with other patterns like the brick or third offset. Similar to the herringbone, diamond tiles can significantly open up your spaces.